The Ultimate Guide to Building Your Own Gaming PC
 12Jul
12Jul Introduction: Building your own gaming PC is an exciting and rewarding experience. Not only do you get to customize every component to suit your needs, but it can also save you money compared to buying a pre-built system. In this comprehensive guide, we'll walk you through the step-by-step process of building your own gaming PC, from selecting the components to assembling and setting up your system.
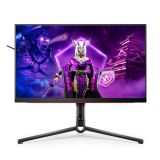
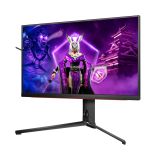
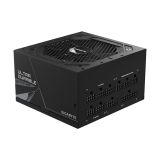
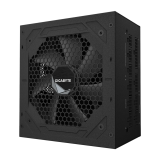
Planning and Component Selection: Start by determining your budget and intended use for the PC. Research the latest components, such as processors, graphics cards, RAM, storage, and power supplies, and select those that best fit your requirements and budget. Consider factors like performance, compatibility, and future upgradeability.
Gathering the Components: Once you've finalized your component list, it's time to start purchasing the parts. Ensure that all the components are compatible with each other and fit within your chosen PC case. Order the CPU, GPU, motherboard, RAM, storage drives, power supply, and any other necessary peripherals or accessories.
Preparing the Workspace and Tools: Find a clean, well-lit workspace with adequate room to assemble your PC. Gather the necessary tools, such as screwdrivers, cable ties, thermal paste, and an anti-static wristband. Prepare your work area by removing any static-inducing materials and grounding yourself to prevent damage to sensitive components.
Assembling the PC: Follow the manufacturer's instructions for each component as you assemble your PC. Start with installing the CPU, applying thermal paste, and mounting the CPU cooler. Next, insert the RAM modules into the motherboard, install the storage drives, connect the power supply, and attach the graphics card. Connect all the necessary cables, ensuring they are securely plugged in.